Showing posts with label Maya Road. Show all posts

Thursday, December 8, 2011

The Christmas Emporium Book Continues....

Here we go again!


 It's been great hearing from you telling me you've got to get out your G45 papers and CREATE!

And some are even following along making Christmas Cards with these pages!

Whatever you're doing, it's wonderful to play along together.

The Box is up on the Graphic 45 Blog today!!!! YAY!!! So THRILLED!!!

Thanks so much to everyone there, especially Charee, I really appreciate the shout out!
You will be blown away with Jim's Wine Box also featured there. AMAZING!!!

So here's 2 more pages. If you've joined use late, the prepping of the book is in earlier posts.


I'm using this as the cover page.

I've fussy cut the toys, added Glossy Accents, and layered with chipboard.

The Santa from Christmas Emporium 8x8 Paper Pad is layered onto the back of Poppy Fields paper to frame.

I LOVE the little boys gazing in the window at Santa....precious beyond words.

Here again I used the Grey TomBow pen to add shadows. And Distress Inks for added depth and color.


The Tag is from the Christmas Emporium Chipboard Die-cuts 1 set. Wonderful pieces!!!


The Letters are from and old set from K&Co. that I added Martha's Copper colored Glitter with Glossy Accents.

The picture (as always with glitter) does not give it's TRUE coppery color justice. Honest....

Added Holly Berries all over with Burgundy Stickles where there were berries on the papers, and some I just made up to balance out the piece.


The other page is this Sleeping Little Darling. I could NOT go without using this great piece.

It's from the 12x12 Believe sheet. It's a rectangular piece, so I trimmed off the right edge and glued the frame section back on butting up the edges. When you cover it up with the tag and JOY, you don't see the seam.


The JOY is made with Gold Martha Glitter as well as the Maya Road Snowflake that we showed in an earlier post. (much more sparkly in person) No Perfect Pearls on this one.

I received this stunning copper metal Ribbon on a gift many years ago and have hoarded it.

This seemed like the perfect place to use it. I love how it scrunches.


The Christmas Stocking Tag is edged with Lime Green Stickles. (it has a bit of gold in it!)

I layered up the 1Cent Stamp and the Sleeping Darling onto chipboard for more depth.

The SD square is also framed onto piece of the 8x8 paper using the Dancing Family square on Happy Holidays. Just wanted a bit more framing here.

It looks like we only have 2 more pages to go, and we'll be done with the book.

Let me know how you're doing, and I'll be back later this week with the last pages.

Be Well, and Be Good to Each Other!

Linda

Tuesday, December 6, 2011

Santa and the Boys Plus Christmas Window Pages

Well, I promised 2 pages today, so here we go!

The first is one for the predominant front and the 2nd is for the so-called back.

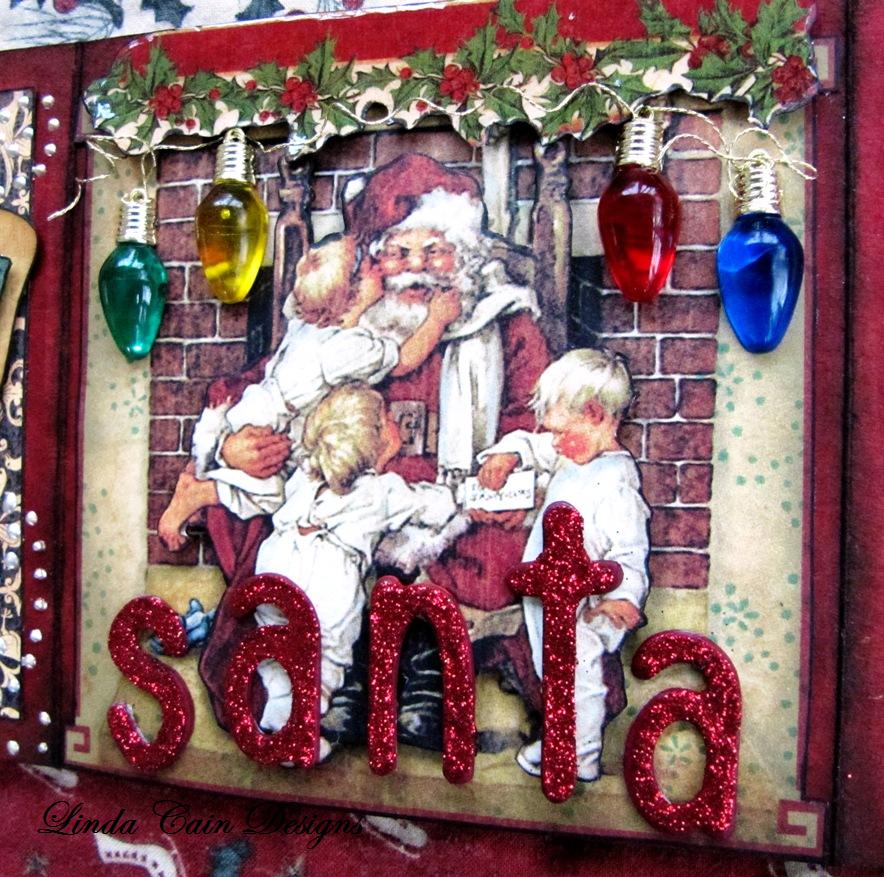
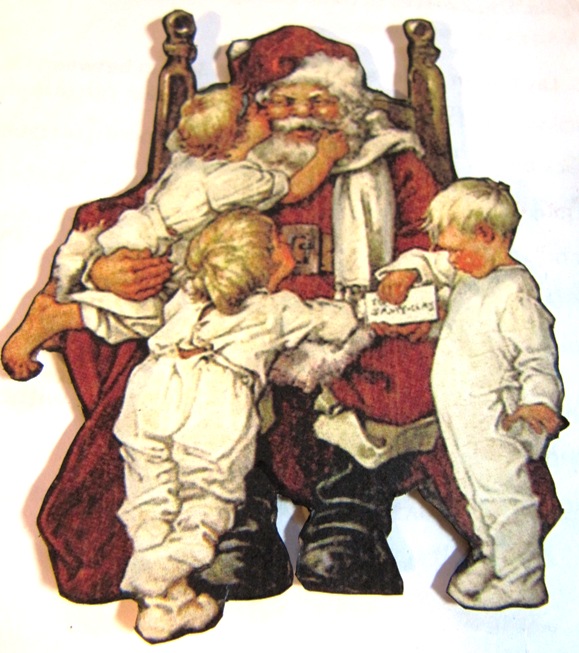
I LOVE this Santa and the Boys from Happy Holidays 12x12 paper.


I used Maya Road Olivia Mini-Letters and red glitter.

Paint the letters the same color as the glitter 1st and then layer on the Glossy Accents and glitter.


I fussy cut the garland from the 8x8 pad Christmas Emporium sheet, and added Glossy Accents. Let dry over night.

Add black permanent marker to edges and chipboard strip to back.


I used 2 sheets of the 12x12 Santa square here. Cut out this one as shown.

Lots of Distress Ink was added here and there. The Dots are stamped with the above stamp and Iced Spruce Distress Ink.

And then add Grey Tombow Pen N75 for shadows. That makes things stand out.

Don't do the Santa and Boys...they'll be covered up.


Then I fussy cut the other Santa square from a 2nd sheet of 12x12.

NOW add the grey pen for shadows.

It REALLY makes a difference in the depth of the pictures.


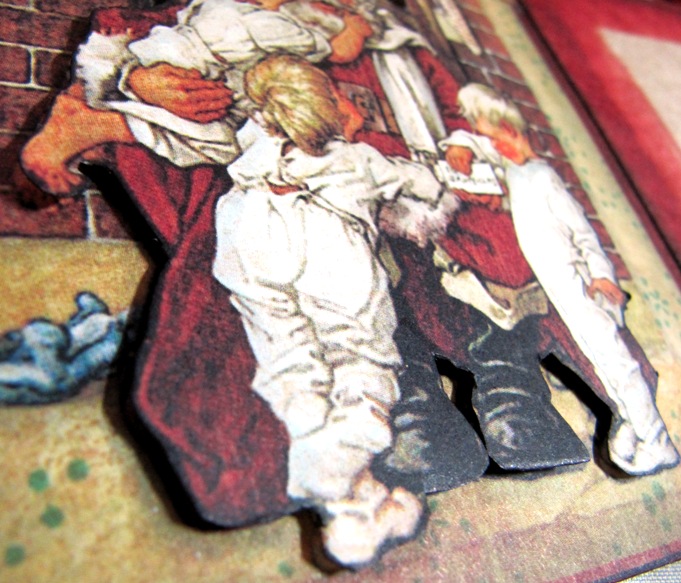
Turn them over and add Black Chipboard to layer-up for more depth.


This shows the layered Santa and the Boys at a different angle.


ADORE these little Christmas Tree lights from Darice!!!!

I added some gold metallic thread, twirled around a wooden skewer, heat LIGHTLY with Heat It Tool, and unwind gently.

Assemble your page as shown!!!!!

what do you think???

Next is the page on the BACK of Santa and the Boys.


This one is much simpler but just as fun.

Here is another one of the 4 sections of Happy Holidays 12x12 trimmed.

I used Distress Inks to brighten a bit, and added the stamped Holly leaves with Olive Archival Ink and the stamp from Christmas Emporium 2 around the frame edge.

I also used the Grey Tombow Pen N75 to shade a lot here.


The Christmas Bells from Tim Holtz Christmas Adornments are colored with Sharpie Fine Tip PensEasy Peasy!

I put the Gold Stickles all around the Window Frame.


Cut out Holiday Wishes from the 8x8 Joyous Noel paper, add chipboard to back, edge with Gold Stickles, and glue to page.

Assemble as shown or however you wish! WHEW!!!!

Come back and we'll work on the remaining pages!

NOW I can move onto the next item on my list of things to do today!


The tree is up, and it needs some wrapped presents underneath it!

Linda

Sunday, December 4, 2011

Christmas Emporium Book


We're Home!


We had a great time on our Smoky Mountain trip! It was full of great food, fun, shopping and tours.

That having been said....there's no place like home!

So I decided to work (finally) on putting together the book that goes into the Graphic 45-5x5 Kraftboard Altered Art Box with Album.

This is just one of the BACK pages. We'll prep all the pages here with Distress Stain to start.
Come back tomorrow for this front section!

This page is a bit bowed in the picture because of the "stuff" on the other side...Greetings really is straight, I promise!


If you have the wonderful box, you know it comes with an insert book. It folds out into 4 accordion pages.

I took one of my favorite Distress Stain - Fired Brick and outlined all the sections to begin with.

Then I added just a touch of Aged Mahogany and Vintage Photo. I used 2 layers of the Fired Brick to get a rich, deep color on the Kraft Paper.

Almost all the papers are the 8x8 paper pad from the Christmas Emporium collection again.

Since you've cut all the pieces out of one sheet for the box, all you have to do is decide where to put theses gorgeous papers!!! Right???

This is basically just a section of the Happy Holidays paper. (This is the 12x12 sheet here.)

I cut out the one section, then Distress Inked with Tea Dye and Vintage Photo and the Blending Tool.

Glue to to 3rd page from the left on the back.


The Snowflakes are from Maya Road, and the Glitter is Martha Stewart.

Add Glossy Accents and pile on the glitter. I use a piece of chipboard or plastic packaging to GENTLY press the glitter on top to flatten. Then move out of the pile to dry.

Thanks to Lisa M. Pace for teaching me to do glitter. She is the Glitter Queen!

(Check out her new book Delight in the Seasons and her new stamps by Pink Persimmon.)

When they're dry, spray with Blue Smoke Perfect Pearl Mist to add a more vintage look.

You can see the difference in the before and after in the picture above.


The Best Christmas Wishes and Greetings pieces are added to black chipboard.

Punch a hole in the tag, add an eyelet, and tie a piece of gold ribbon.

The Snowflakes needed a "little somethin' more" so I added a Rhinestone.

These were clear, so I added a bit of Denim Alcohol Ink to them for color and contrast.

A Green Metallic Gelly Roll pen makes a few marks around the border, and Coffee Archival Ink added a few more swirls on the tags.

I found the tiny wreath somewhere in my travels, and it was exactly the same size as the one in the picture!

The Star is from Mark Richards.

So I'll be working to put the other pages up as the month goes on.

But my suggestion for gluing is start on the back with the flat pieces, and move to the front.


Live and Learn!

Don't forget that Inspiration Emporium has $5 shipping in the US, and they carry all the things you need for Tim's 12 Tags of Christmas. So check them out!

Linda

Thursday, September 22, 2011

Kraft Tag and Picket Fence Distress Stain Fun


It was a pristine day on the lake. Blue skies and the trees are turning. I got some great shots of the sunset on the lake. I'll post them later.

Gotta eat the goodies from the bakery in Cold Springs. It's a must stop whenever we are here.

Enjoy the tag. I did!


One of the new products from Ranger that were showcased at CHA was the new Kraft Tags.

These are really fun to work with, especially when you add the Picket Fence Distress Stain.

I LOVED working with the smaller tag and adding the new colors in the Distress Stains over the great opaque-looking Picket Fence. I used Dried Marigold, Broken China, and Dusty Concord.

I sprayed with a light mist of Pewter Perfect Pearls Mist and heat set.

Then stamp with one of my favorite Tim stamps of all time, Lost and Found and Urban Chic using Jet Black Archival Ink.

The Maya Road trim at the bottom gives you a good base and the Shabby Accoutrement in the lower left corner brings your eye into the piece for a starting point. I tied waxed linen through the button.

The Lavish Trim is died with Worn Lipstick, Wild Honey, and Dusty Concord   Distress Inks dried with the Heat It tool.

Add a small pearl Bauble, Type Charm, and gold Chain Tassle with a Jump Ring to the ribbon and tie in a bow to the top.


Have a great day and hope to hear what you think of the new products!

Linda

Friday, December 17, 2010

Christmas Configuration My Way & a GiveAway!


Hello Bloggers from the cold and snowy Midwest!!!! At least the sun is shining today. I tried to take pictures yesterday, but wasn't happy with all of them. So today I tried again...a bit better, but never satisfied. That's why the colors may be a bit different as it's 2 different light settings... here goes nothing!

This is no tutorial, so just look and enjoy...then go create! I will tell you some of the products along the way. Graphic 45 papers on the sides, Margies - the Girls Paperie inside as well as BasicGrey, 7Gypsies and Tim Holtz Seasonal paper stash. I also used one of Tim's stamps and the hanging sign Alteration.


This is from Tim's Holiday paper stash. I LOVE this Santa so much. Robin said it reminded her of her childhood and reading "The Night Before Christmas." This had Tim's Tissue Tape and gold garland from Trim-A-Tree on the edges. the boxes are sprayed with various Adirondacks sprays and Perfect Pearls Mists. I LOVE THEM ALL!


Felt stars were glittered using the technique I learned from the"Queen of Glitter", Lisa Pace. You must have her book...maybe Santa will bring it! I really love the Christmas lights hanging on the side with Martha glitter on them and gold cord to hang them. They are years old....and I have not seen them since....from Hobby Lobby. Wish I had a whole bunch more.
The tree is from KaiserCraft. Too cute!


The little girl is from Paper Whimsy....best Vintage Photos ever! Gale is brilliant when it comes to recreating these treasured images. I used a Book Plate and a Facet from Tim for the little girl. And the little tree and wreath I got at Red Lead in St. Louis!!!


The Santa's are Stickers from Tim and the Star is Vintaj. I added some color with metal in the center from Ten Second's Studio.


The vintage button I bought as well as the hand painted Snowman and Angel button on the tree. The Joy is Maya Road that is glittered.


THEN....this is what I really had fun with. You glue it to our ever popular piece of plastic packaging, fold a strip at the top and glue to the top of the little box!

It is brought forward and looks to be hanging. Bill was impressed.


Wrap a wooden block in tissue paper and tie with a bow. Add Glossy Accents to a Bingo chip from Maya Road...glue to a wooden star, a small circle to raise it up, and pop into the box.


Now, if you followed this to the end......WHO WANTS A CONFIGURATION? Leave a comment and we'll send out one with some Tools from Tim, too! May even get it before Christmas!

Be Well and Have a Great weekend!!!!


Linda

Saturday, December 11, 2010

Townscape Christmas Standup Tag


There's no sunshine in the city today. Just rain, and more freezing rain tonight. So, there's not a very good picture today, but it's the best I could do.

Here's a fun way to show off your little Christmas tags. I started with the manila tag that I'd Distress Inked with Concord and Sapphire and a bit of Marmalade in the middle. Spray with Perfect Pearls Mist Forever Violet. When dry emboss with snowflakes (these are a Cuttlebug set-don't have Tim's...but they would do, too).

Sand a bit of the snowflakes off and highlight with a white pen. I used a Sharpie Poster Pen as it has a soft tip and a pen will smoosh down the embossing.

Then the little snowman is on Ten Second's Studio Peacock metal. LOVE this color. I embossed it in the Snowman Texture Plate from Tim and after sanding and using the steal brush on him, I cut him out . Simple, heh?

The TownScape is a piece of the metal tape again that I mounted onto heavy manila cardstock before I cut it out on the die. This makes it more stable. Then take a refiner tool, and decorate the houses. Using Alcohol Inks, I painted the little houses and sidewalks using a brush.

You can make them as elaborate as you like. Cut the house strip wider than your tag, and add it with a small piece of the metal tape at the sides. Bow it out and the back of the card so it will stand up. I added an oval piece of chipboard on the bottom for support.

The Star is a piece from Maya Road painted and Glittered with Martha's Crystal Fine White glitter. Glue your card to the star and add Texture Paste around the townhouses.


I cut the Snow Flurries out with the metal tape, and added to the top of the card only gluing the very top to the card. Bend the snowflakes out for affect. Detail it with some Turquoise Stickles. Paint some Grungeboard or Chipboard letters and accent with the Stickles. Assemble with glue and pop dots.

Tie a matching metal edged ribbon in the top and it's ready for the coffee table!

This is our little Star, Emma the Ham Hock! She's still so proud of the missing tooth! The Christmas Program always is a treat.


Mommy and Daddy got her to stop moving for a moment afterwards for a family picture. Erin was up in the choir loft with her friends. You've got to get the shots when you can.

So, that's it for me for the week. Have a great weekend. To my Midwest friends, stay warm and safe. Stay in and play along with Tim and the Christmas tags. It's gonna be ugly out there tomorrow! Yuck!

Linda

Tuesday, April 27, 2010

Showers Bring Flowers

As some of you that know me are aware, I really got started with paper arts by going to a Scrapbook party at my DIL home years ago. I had just really started stamping, and liked the combination of the 2.

However, I hadn't scrapbooked in years until Cheryl called and asked me to be on the Creative Imaginations Design Team......so I'm using photos of the Grandkids to make some fun pages and use all my other ART stuff.


This is Erin at her new house in front on their park bench with a colorful umbrella. The shot just screamed for Petaloo Flowers!!!!!!!!!! And they matched perfectly. The Luminarte Radiant Rain and Twinkling H2O's were used on the Maya Road letters and the Black Doily paper. The Blue Pearl RR spray on the black paper is really great in person...photo does not show the metallic shine well.


The white pen marks made the papers pop. And of course, Distress Inks had to be used on all the edges to add just a bit more color.


May 1st is National Scrapbook Day so go take a peek at the CI blog and get some inspiration...(Erin's page is over there with all the details on product).
~
Have a great day...I'm going to be in the GARDEN!!!!

Monday, February 15, 2010

Brittany's Book


This is the cover of a book project for Creative Imaginations. I used Distress Ink and pen marks to enhance the beautiful papers.


Cut out butterflies and Stickles on the flowers.


Beadazzles on the chipboard....VERY cool!!!!!


Love the way she added just the yellow to the flower.


I made this book using Bare Elements book Beverly and papers Passion for Fashion. This was a really fun project since my Granddaughter, Brittany, is soooo much a shoe-freak/clothes-horse/photo diva.

She really is good. I love the black and white photos.

She's off taking a photography class now using our old 35mm camera to get more wonderful shots. Can't wait to see them.

To see the products list, go to the CI blog and enjoy the other books that were made this month!!!

Friday, October 23, 2009

Scrapbook News and Review-Guest Blogger


I know, it's not even Halloween yet, and I'm blasting you with Christmas stuff!

This is a project that is on Scrapbook News and Review tonight with a little bit about how it was done and a little bit about me in the Guest Blogger area.

This was really fun to create, because I could drag out all kinds of stuff from my stash and just play. No worries about recreating or writing up instructions.


Enjoy and don't forget to go read their blog. It comes out every week with a guest blogger...next week is Teresa Collins. Talented lady!

And just a NOTE: These are the same products used in the Christmas wall hanging class. Spots are filling up. Only a couple of spots left for the Wallet class. It's going to be fun!!!!!

Create ART!

Tuesday, September 29, 2009

Busy Time of the Year


In between tearing down the garden, soccer games, marching band festivals, vacation and everyday chores, I've been trying to work on a Graphic 45/Maya Road project for a class. I LOVE these papers!!!!

Every once in awhile a truism from my mom comes into my head..."never enough hours in the day." She was so right in so many ways.

When the time is there, the daylight is gone, or something else seems to crop up.

And I still have not finished the Last Oracle!!!

The weather has been so great here. I LOVE fall. If it just didn't come with so many allergies. I think I'm allergic to pond scum. Seriously, the algae on the lake was really bad in spots and it did make me cough.

Life....it beats the alternative!

Create ART!

Monday, August 31, 2009

Projects Are Calling Me

Margaret from Scrapbook Friend'z gave me a scroll coaster book and some new mini pieces from Maya Road and sent me out the door Friday to create a store sample. Houses, snowflakes, and Christmas, oh my!
*
Tim Holtz pine trees in the background. And Distress Rock Candy Stickles on the snowflakes. Hard to see here, but great in person. And layers of Distress Inks on all the chipboard.

If you know me and Row Houses....that's what got me started!!! Oh, boy! Here is the cover. Waiting on some papers.....not a good waiter.

I've been working on it in between the GK's here this weekend and painting the windows.

All's going well today with the last stage. So I'm happily crafting away doing ART in the Studio....with the drill and saws going full blast downstairs.

Update later....OH! And the new papers have arrived at Prairie Art Stamps in Springfield, Il. from Graphic 45!!!
*
GO GET THEM!

Tuesday, August 18, 2009

Watermark Ink and Distress Embossing Powder? AND ADDED Penny Smith's Slide Show!!!!!


Tim Holtz stamps, Distress Embossing Powders, Glossy Paper, Watermark Ink, Paint Dabbers......know what to do with them?


We're getting together at Scrapbook Friend'z to make ATCs and learn different techniques with all the cool products you've had to have....and then stored away.


Hey, I've done it. I buy things and put them away. I'm a hands-on person. So I went to Ranger U and learned to use a lot of inks and paints. Now I share.


Want to have fun, and learn at the same time? Come and join us.

See you there.

Linda

UPDATE:You have got to see Penny Smith's Slideshow of the classes from Satureday!!!! WOW!
http://www.slide.com/r/wx2i5LB26j-v0785vRAdODdK6UD8mSxl?emt=1067381811229489416

Saturday, May 2, 2009

Just One More

OK, Can you stand one more picture of what to do with the tin boxes?????

These are Maya Road boxes. And if you had my class in Bloomington where we used the Alcohol Inks and stamps to remove color and leave an image, you know how to do this.


Just do it on the inside of the lid and add white paper backing to show your stamped design. Glue on the edges!!! Sand off the ink on the letters.

Tim Holtz came up with this wonderful idea, and it's on his blog in tutorial form.

Just quick ideas for some fun....perhaps a Mother's Day giftbox as suggested by a blogger comment. Did someone say diamonds?!?!?!

Have fun! Create ART!

Thursday, April 30, 2009

Tiny Collage Boxes

Ever wonder what to do with the tiny metal boxes you get supplies in from Maya Road? They are way too cute to toss.

So add some alcohol inks with a brush....since it is a tiny area...add several colors in layers. Then cut an image from Paper Imagery Designs image, add some words, a couple of rub ons and gently push under the metal lip inside the box.

Simple, fun, and a tiny gift box for something special!

Create ART!

Monday, March 9, 2009

Dress Form Collage

Remember the necklace from the last post? Well, I thought I needed a place to showcase the piece.

I've had this dress form since our trip to Carolina Moon during CHA-S 2007. (Bless Cecile's little heart for taking us there. Boy, can that girl drive!! )Sometimes I need time to think about how to use something...no kidding.


And yes, the butterflies are really that vibrant. They were from a piece of Collage papers in Somerset magazine. I don't know why you can't click on to enlarge the back...over my head.

Keys are t!m's, Idea-ology, there are pieces from Vintaj, Maya Road, Grungeboard, Grungepaper, Distress Stickles, and various vintage pieces I've collected. The white knob on top was aged by using alcohol inks. It was too bright for me....so....ink it!

And the papers are 7Gypsies tissue paper I've hoarded for years over several layers of paints that were wiped off and added again until I got a really old look.
I know that look when I see it....I see it every day in the mirror!!!!!

Have a great day!
L