Monday, May 24, 2021
"Haunted Door" MEGA Shine Gift
Hello everyone!
No I'm not rushing Halloween when it's not even Memorial Day, I just needed a 30th birthday gift for my oldest granddaughter I affectionatly call "the Ghoul." She has always loved bats and cats, and just anything along that line. So this Haunted Door MEGA shrine from Retro Cafe Art Gallery was right up her little ghoulish alley. It ends up about 9.5 inches tall.
The spiders and shrine all come in the kit. I used Finnabair moulds and resin for the skulls. Then I embellished them with Metallic Flakes and Jewel Effect Pastes. The top spider is adorned with 2 Melanage Art Pebbles.
The door opens on the right and you can hide, store, capture, torture, whatever you want in it. I am fully confident that Britta will find something to place inside.
I used the Checker stencil with Diamond Rings Jewel Paste. The web on the door is painted with the Blue Opals Jewel Paste.
Using the Wings and Bones Mould and resin, I created these little lovelies. Then I covered them with Copper and Gold Metallic Flakes using Gliding Glue.
The sides of the shrine were painted black and the stenciling is applied with a silicone brush. Here you see the Golden Dust and Crushed Amber using the Tapestry stencil, and the black skull before the flakes are applied. As always, the kit is put together with a bit of white glue. I used 3D Matte Gel for the embellishments.
Most of the supplies can be found at Retro Cafe Art Gallery and Mixed Media Place.
Check them out and have a jump on creating for your Halloween fun.
Linda
Products Used:
Finnabair - Heavy Black Gesso
Finnabiar Mould - Wings and Bones
Finnabair - Gliding Glue
Finnabair - Melange Sugar Art Pebbles
Finnabiar - 3D Matte Gel
Monday, May 17, 2021
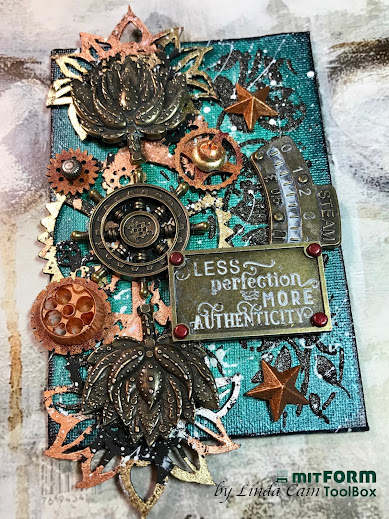
Less Perfection - More Authenticity Please
Here it is time to show you another project using Mitform Tool products. I love putting Finnabair pieces with them for a really steampunk look.
The Story:
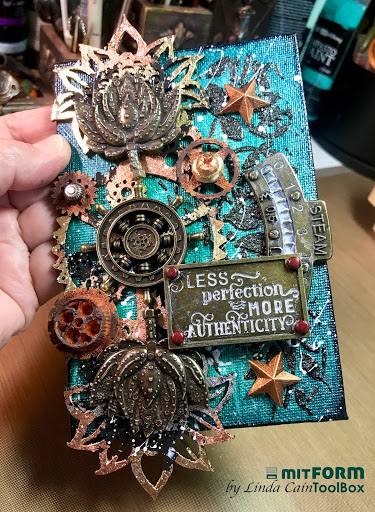
The ship's wheel here is the steering mechanism for your art journey. You alone need to set the level of steam for how you navigate your journey. It's difficult not to be too hard on yourself creating pressure for perfection. Just being yourself, and not trying to be someone else, makes your art more authentically "you". Keep your eyes to the stars, looking up, and let the gears of your creativity move in the right direction.
This starts with a small canvas board. I added metallique paints and archival inks over the white gessoed board. I added some Sparkling Onyx jewel paste with the Passiflora stencil and white paint splatters.
The Machine Floral Decor chipboard set is painted and also has Steampunk Metallic Flakes added.
I sprinkled some Mechanicals and resin cast pieces into the mix. The Old Plate has painted brads and a bit of paint for contrast.
In this project, I liked the shiny brass of the Mitform pieces, so I left them as they were. They were perfect with the color of the other elements.
Layer the pieces on chipboard scraps and adhere with Heavy Body Gel or 3D Matte Gel.
This is a simple project that can come together quickly or it can me elaborated on with many other layers. You can add stamping or tissue paper and still have the same basic ending.
Be well and check out the links below with Retro Cafe Art Gallery here in the USA for most of the products used.
Your Friend in ART,
Linda
Products Used:
Finnabair Art Extravagance - Jewel Texture Paste - Sparking Onyx
Finnabair Stencils - Passiflora
Finnabair Prima Art Decor Mould - Machine Parts
Finnabair Decorative Chipboard - Machine Floral Decors
Finnabair Art Ingredients - Metallic Flakes - Steampunk
Finnabair - Gliding Glue
Canvas Board 3x5
Subscribe to:
Posts (Atom)


