Showing posts with label Jennie Bowlin. Show all posts

Tuesday, September 4, 2012

Collage on Wood

So, I had the great pleasure of meeting and talking with Ania Dąbrowska aka Finnabair. She is as brilliant and kind as she is beautiful.
 
My friend Lin Brown from the UK was lucky enough to take one of her classes and told me I had to try her wonderful techniques....long story short....this is my attempt at a Finnabair Collage.
 
(You MUST visit Lin's blog and see what fabulous pieces she made in Ania's class)
 
It was a real treat to dig out old hoarded treasures from the past to randomly cut and glue to this hanging plaque I got for a song at HL a long time ago.
 
I used the new Tissue Wrap Melange Tim sent me as the base...how could you go wrong starting with such a gorgeous base???


I loved how the Crinkle Ribbon took the Distress Inks and Stains. That stuff is just so amazing.
 
 
The little girls are on a clay button I made years ago. The image is from JVO's Collections.
 
There's a real snap, the innards of a watch, a Vintaj piece and a button with a crown all sprayed and layered with Multi-Medium.

 
This gold frame was perfect to go around a piece of paper with at 7 on it, and a metal embellishment.
 
The little bits of computer pieces are here and there.

7Gypsies gaffer tape and a Vintaj butterfly.


This is a Jenny Bowlin button, I think....not positive...and some metal piece from long ago on top.
 
I love the Mini Lightbulb I just got from Time Pieces.
 
The computer glass fit perfectly into the Spocket Gear.
 
Sadly the mica sparkle doesn't show up well in the pictures...but you get the idea.


The nylon netting created a cool affect under the butterfly.


I added a few stamps here and there to fill up space under the trims that were glued on and sprayed.
 
I used Perfect Pearls Turquoise and Perfect Copper on the KaiserCraft flowers and all over.
 
The flower has a Grungepaper and Metal Foil base that was embossed. It gathered some of the spray as well.
 
This is by no means anything near what Lin or Ania created, but it was a fun project, and that's all that matters!


Tonight we had a great Birthday Dinner with my son Jeff and his family. This is his oldest Erin.(she's 11!)
 
The food color dye is slowly coming out...I think we're doing Blueberry next time!
 
Have a great week.
 
Linda
 

Sunday, November 6, 2011

Who Wants a Tutorial????


Thankful, I am so very thankful for all my blessings, especially my wonderful family and friends.

So, for you peeps out there who want to CREATE, here's a tutorial using some fantastic products from Ranger and the talented Mr. Tim Holtz.

I love using my favorite Tool-the Vagabond to die cut and emboss for this tutorial.


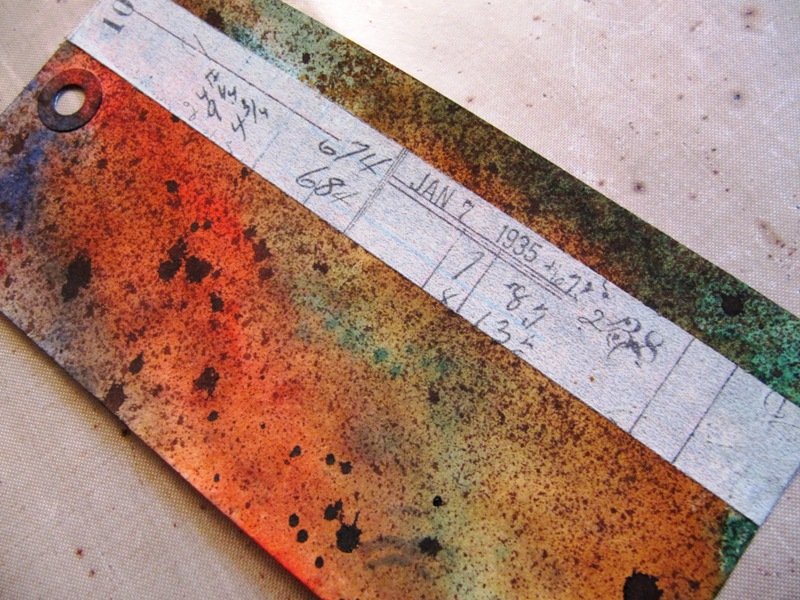
First I  took a #8 Manila Tag, spritzed it with water, and swiped several colors of Distress Stains over the tag letting them blend slightly.

I used Chipped Sapphire, Barn Door, Broken China, Tea Dye and Pine Needles. Spritz a bit more and dry with a Heat It tool.


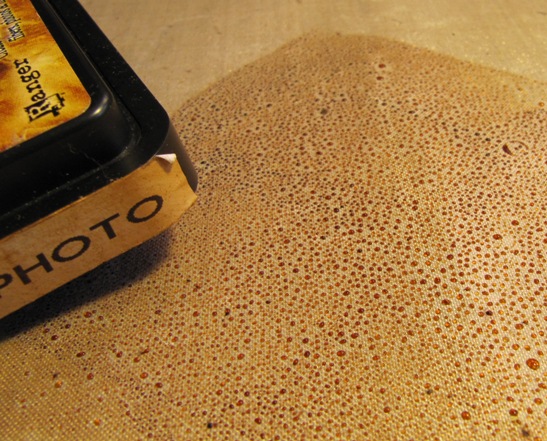
Then swipe your Distress Ink Pad Vintage Photo on your Craft Sheet and spritz with water. Dip the tag in it, heat set, and pick up a few more dots of color for interest. Dry again.


Then I sprayed a slight mist and drops of Espresso Adirondack Color Wash. Dry again.


Add a strip of Traveler Tissue Tape to one side. If you're really reading this...you don't have to dry here....that's a joke.


OK, this is upside down to some people...I used the new Thankful Texture Fades on the tag. Then carefully...carefully swiped Black Soot DI across the raised letters with the Blending Tool.


You've seen this technique before, but here it is again. Die cut leaves from packaging plastic with the Tattered Leaves die.

Add Alcohol Inks to the back.


Then add Copper, Gold and Lettuce paint dabbers OVER the Alcohol inks....this is all on the back of the leaves.


Flip it over and add vein lines with a permanent pen. I like the Write4All by Stabilo.  Add a bit of Gold Paint dabber to the edges, too, for contrast.


A dash of heat from the Heat It Tool and you can curl the leaves as you like.


I added Gold Acrylic paint dabber over the embossed area...kind of hard to see the contrast here.

The cool stencil is from Julie Balzer -Time Travel, (they have a whole ton of new stencils in at Inspiration Emporium in the Just In section) added with Jennie Bowlin Malted Milk paint dabber.


I pushed the Spinner into embossing ink, then into the jar of Spruce Green UTEE and hit it with the Heat gun.

 Sprinkled a few bits of Butterscotch Adirondack embossing powder. And heated it again.


Then I decided it needed better contrast, so I took the top off the Copper paint dabber and painted the word Thankful.

Now you wonder, why then should I go to all the trouble to add the Black Soot DI???

Because it has created the perfect shadow outline to the raised letters!!!!

I would like to tell you I planned it that way all alone, but it's just a happy result of constant layering.


Since there's a lot of metallic color and plastic, there is a lot of different colors that show up in different angles of shooting the photos.

I think the copper lettering and the gold paint on the leaves shows up best here.

Layer up your leaves, a Timepiece and brad with your spinner. Add some Copper paint dabber around the edge of the tag.

I like to add my tags to a piece of black chipboard for stability.

And a row of Gold nailheads from Mark Richards is at the bottom for one last section of Bling.

That's my Thankful Tag Tutorial.

What are you thankful for??????????

Type a comment and let me know. Do you want to see more tutorials or just pictures?

It's no fun talking to yourself....all you bloggers out there know what I mean.

Your Friend in ART,

Linda

Monday, July 18, 2011

Blogging from CHA - RANGER CLASS!!!!!


Ok everyone, I have 10 minutes to blog this and then leave for another class.  The next one is with Sally Lynn McDonald. WHOO HOO!

I know you only look at the pictures anyway, so I won't have to say much! HA! KIDDING!

THIS is the fantastic project we made today with Ranger!!!

LOVE IT!!!


This was Jennie Bowlin and her fun and fantastic things.........buttons, rubon butterfly wings, stickers and a Curio Knob from Tim. So Stinkin' Cute.


This is Claudine's magic with the Metal Foil tape and her stamps. I had some left over buttons from Jennie I put on back in the room,  And her paints...love the colors.


And then of course, the Master, with all the wonderful pieces here, Kraft Resist paper, Tissue Tape, Corners, Knob, Crackle, Plaquette......I could go on, but you get the picture...literally! OH, and the Distress Stains on everything!!! WHOO HOO.

So that's it for today. Check out the Ranger blog here.

LIVE from Chicago, I've got to run!!!


Linda

,