Friday, September 13, 2013

Blog Hop with Seth Apter's StencilGirls & A Giveaway!

Hi everybody!
 
 We're having a  BLOG HOP  at  StencilGirls Products!
 
A few weeks ago Maria asked me to be a Guest Designer, and since I LOVE Maria dearly, I said yes immediately!
 
So, I'll be a GD on Oct. 4th!!!
 
But then, I was lucky enough to have her ask me to join this Blog Hop today, and this is my Canvas Bag Project with a Seth Apter Stencil design. 
 
 
I'm so happy with the way this turned out.
 
 
This is the stencil we'll all be using - L183.
 

I start with a plain canvas bag. It is rather course, so detail will not be extremely crisp, but I love how it took the colors.

 
We start with a pile of products including paints, stamps, inks and pens.


First I laid down a base of Irish Cream Fresco Acrylic paint with Cut-n-Dry foam. (I did not get a picture of the bag at that point. Sorry.)
 
Then I start taping down my Stencil and adding white paint. Use tape to make a border around the section you want to stencil.

Move your stencil around making several different sections.
 

If you want the color to POP, stencil in white paint and add color on top. This keeps your colors bright, as shown here with the  shades of green Fresco, and then Silks to add shimmer.
 
Next I outlined with Tulip Fabric Pens and added drawings around the bag.


The Silks are added here over the Frescos to brighten up the chalk paints.
 
You can see the Silks on the green accents as well. It's very hard to show their true beauty in a photo.
 
 
Script stamps and white paint are stamped around the center section.

 
I kept adding the Fabric markers to outline the stenciled parts.
 
I also did some freehand painting around the bag.
  
 
  The last thing I did was use several foamie stamps and Fresco paint to create a trim around the edges with opaque Baltic Blue.
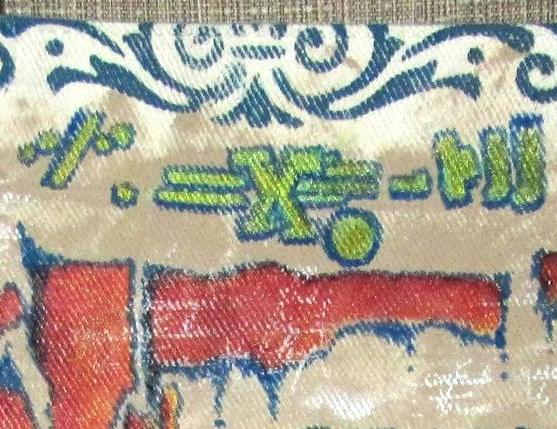
 
 
This is a detail of the stenciling, painting and stamping.
 
Hope you enjoyed this...and now leave a  COMMENT here to enter the Giveaway.  Then HOP to the next blog!

Maria will be having a giveaway on StencilGirl Talk.  All comments submitted on the ENTIRE HOP (all blogs) are eligible to win. So leave a comment on each blog for more chances to win!!!

Good Luck to everyone!
 
Linda
 

Monday, September 9, 2013

Some Halloween Jewelry From Reto Cafe Art!

 Who wouldn't like to wear some fun Halloween Earrings this year???
 
These are way too much fun!!
 
So check out the links at Retro Cafe Art!


These are the little Coffin Charm Tiny Trinkets.  A tiny Graphic 45  Mr. Seymore Bones adorns the insides.
 
Glossy Accents and Inka Gold  make them really easy to put together.


This is a picture of the back of the earrings with Viva Crackle and Inka Gold.
 
So easy....so cool!
 
 Bet I know who would want these to wear in her Haunted House stint.....
 
 
These are pretty simple. The Spiders come just like you see them here. I just added some silver link chain and ear wires.
 
Done!
 
At first glance this picture looks like the Skeleton has Mickey Mouse ears on....I was going to change it, but ah, maybe it's just me and I'm easily amused.

 
Some charms and Cutouts with just Inka Gold added to them...really!
 
 So get your "Halloween ON" and create some great little trinkets to Wear or Share!
 
Linda
Retro Cafe Art Products:


Wednesday, September 4, 2013

Results from my Retail Therapy

I had some Retail Therapy the other day and snagged some items I've been wanting.
 
I got the new Small Creative Journal from Dylan Reaveley, and the Olde Curiosity Shoppe stamp set from Graphic 45.


This is the end product of my day of fun in the Studio. I LOVED it.


I started with adding bright colors of Distress Inks with blending tools to the perfectly sized pages.
 
Start with the lighter yellows in the middle and build out with darker colors. I always use 2 shades of the same color to get a base and a shaded look...eq. Ripe Persimmon and Spiced Marmalade, or Salty Ocean and Peacock Feathers.
 
Next I "clapped" some water drops onto the inked paged, and then used the Large Diamond Background II from Retro Cafe Art Gallery with Peacock Feathers to break up the color.
 
Then I stamped the fabulous Bottles with Jet Black and the Labels with Coffee Archival Ink!


I used Fresco Paint to add white dots with the Mixed Media Stampset from Tim, as well as the Chickenwire stamp.
  
 
The other stampset Classic Favorites 02 has creates the pedistals and backgrounds.
 
 
The Night Sky - Phases of the Moon stencil from Retro Cafe is used in 3 places, and then has many layers of penmarks around them.

 
I really like how the bottles from Graphic 45 turned out, but I added some artistic scribbles around them and lots of Distress Markers as well.
 
REALLY liking the new BRIGHT shades that came out.
 
 
This is my pile of supplies used for the page.
 
Check out the links and as always, ask me any questions that you may have.
 
Your Friend in ART,
 
Linda