Time for another post for the Finnabair Creative Team on
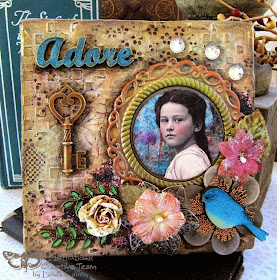
I love Vintage...vintage clothes, buttons, trims, pictures....you name it I love it. So this is a tribute to a lovely little Lady in a magical setting.
I start with a 5x5 stretched canvas.
I lathered on the White Crackle Paste in a heavy pattern. The way this stuff crackles is totally amazing. I let it dry for a day and made sure by using a heat tool just in case. It was really thick.
Next I added Modeling Paste using the Checkered Stencil.
I sprayed some Walnut Ink onto the canvas and let it seep into the cracks, then I removed it in areas with a baby wipe.
I painted touches of interference glazes to areas. Using a sponge square, I added some Sepia Archival Ink to the edges and stenciled areas.
I painted touches of interference glazes to areas. Using a sponge square, I added some Sepia Archival Ink to the edges and stenciled areas.
Feeling
brave, I sprayed several Dylusions sprays onto the canvas and sealed with a
spray. There’s a thin line between brave and foolhardy, and I believe I crossed
it. So, I set out to “fix” this little setback.
I added 2 layers of Heavy White
Gesso, and liked the results! Then a bit more Sepia Archival ink with a sponge.
The
next layer is black Archival Ink added with a sponge square. Then more Gold
Interference Glaze. You can really see the shine and contrast of black ink here as well as the colors coming through.
I added more Sepia and Black Archival Inks to the top and edges and gold to blend in. Then out comes the STAMPS! Fill in areas here and there with some black accent stamping using Sunrise Sunset #4 set.
I started to lay out the elements of the collage. I added Green-Yellow Inka Gold and Copper paste to the Pendant and Key.
The Adore word had been painted and stamped, but needed to have more color to stand out, so I painted it Blue and added some Gold paste to the edges.
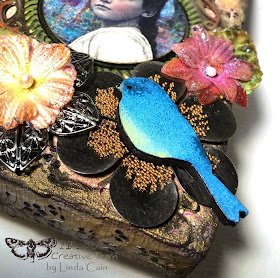
This detail shot shows the incredible cracks created with the Texture Paste.
I used Vintaj Patina paint on the Mechanical Leaves and cut a vintage picture for the center of the Pendant. You can see the shading added here with pens and sparkle on the flowers with White Art Sugar.
The painted bird is from Retro Cafe Art and he sits atop a Medium Mechanical Flower that has Copper Micro Beads added with Soft Gloss Gel.
The peach colored flower sits atop another Medium Mechanical Flower.
And since I was lucky enough to receive my new box of goodies before this was finished, (YAY!) I added the wonderful Blush and Black Micro Beads, plus a sprinkling of Violet Glass Glitter. I think it's my new favorite glass glitter color.
Glue it all together with some 3D Gloss Gel, add 3 clear Rhinestones, and you're done!
Hope you enjoyed the tutorial. Let me know what you think, or if you have any questions. Be sure to click on the links below for product information.
Your Friend in ART,
Linda
Products Used:
Sunrise Sunset #4 Clear Stamp Set
Other Finnabair Products soon to be in stores:
Violet Glass Glitter
Black, Blush, and Copper Micro Beads
Other Products Used:
Retro Cafe Art Gallery - Birds, Valentine Word Cut Outs-Adore, Antique Brass Heart Key.
Other Products Used:
Retro Cafe Art Gallery - Birds, Valentine Word Cut Outs-Adore, Antique Brass Heart Key.


